

Many people want to know how to extract audio from video using Filmora video editing software. Exporting audio(mp3) from a video file is not a difficult task. If you are also trying to export the audio (mp3) from a video file then this article is for you.
Today in this article, I’m going to share how you can easily export audio (mp3) from a video file using Wodershare Filmora software. Wondershare Filmora is a simple video editing software.
Here is the complete step-by-step guide to export audio (mp3) from a video using Wodershre Filmora software you just follow the steps on your PC.
| Also Read: How to use Filmora without Watermark for free.
Before proceeding with the article make sure that you have already installed the Wondershare Filmora on your PC. If you don’t then here to download and install it.
Let’s learn…
How to Extract Audio from Video using Filmora
Well, you can easily extract audio from video using Filmora video editing software, just following some simple easy steps.
Follow all the steps given below to export only audio (mp3) from a video file using Filmora video editing software.
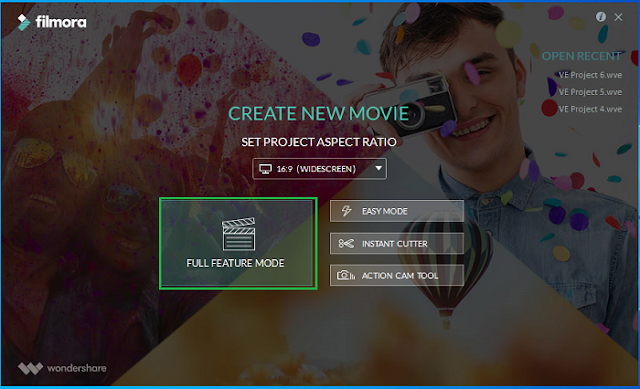
Step 1: Open the Wondershare Filmora you can find it using the Windows 🔎 option. After opening the software first select the “Full future mode”, option.
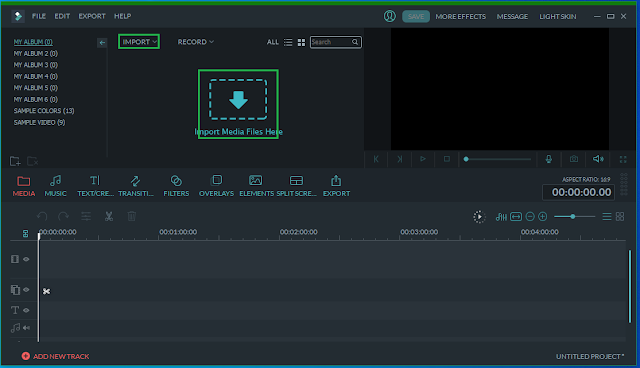
Step 2: Now the Filmora dashboard will open, then click on the import ⬇️option and select the media file, you want to export the audio, and then click on the “Open” button.
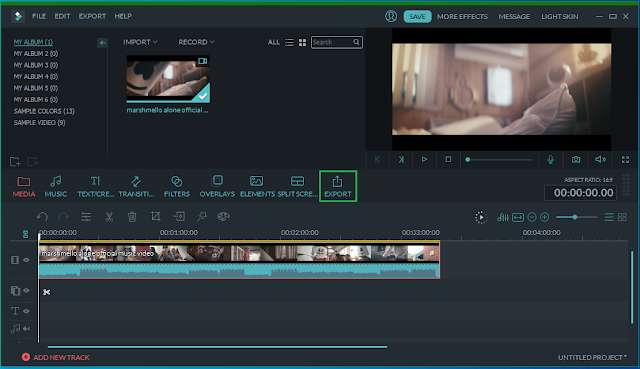
Step 3: After your media file is imported point the mouse into the media file and click on the ⊕ button then the video will be added to the project. Now click on the “Export” option.
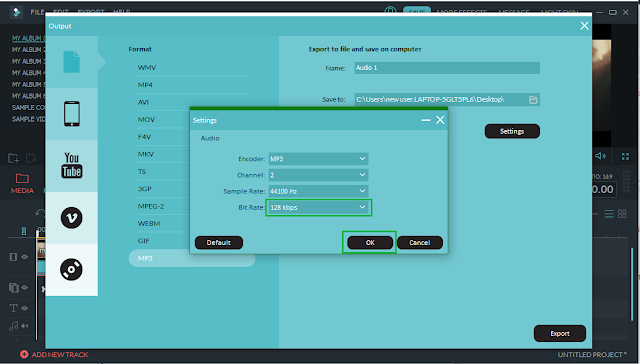
Step 4: Now the output dialog box will be open, select the MP3 format and then give the file name and the file destination or location where you want to save the audio file.
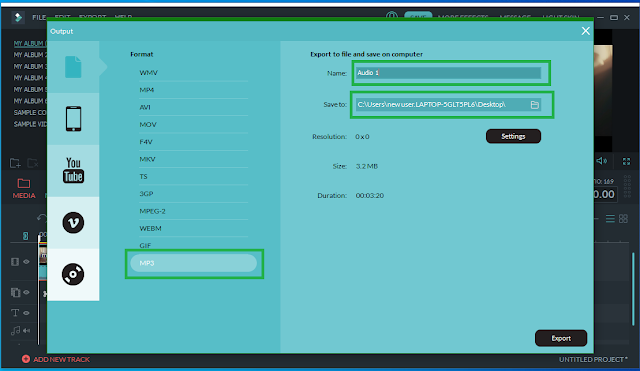
Step 5: Here you can change the bit rate of the audio. To customize the bit rate for audio click on the “Setting” option, then the setting dialog box will open. Now you can select a bit rate like 128kbps, 320kbps or custom then click on the “Ok” button.
Step 6: After all, is done just click on the “Export” option then the exporting or converting of the audio will start immediately, sometimes it will take a little time to complete.
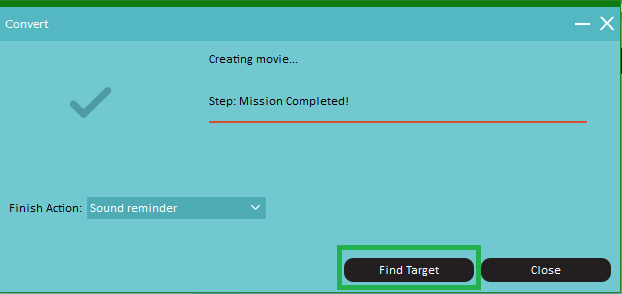
After completing the exporting click on the “Find Target” option to find the audio file.
Congrats! you have exported the audio from the video successfully. Now enjoy the audio.
For more such kinds of Tech Guides, you can follow our blog. Thanks visit again!!